
Drywall Crack Above a Door: Why Proper Repair Matters Before Painting

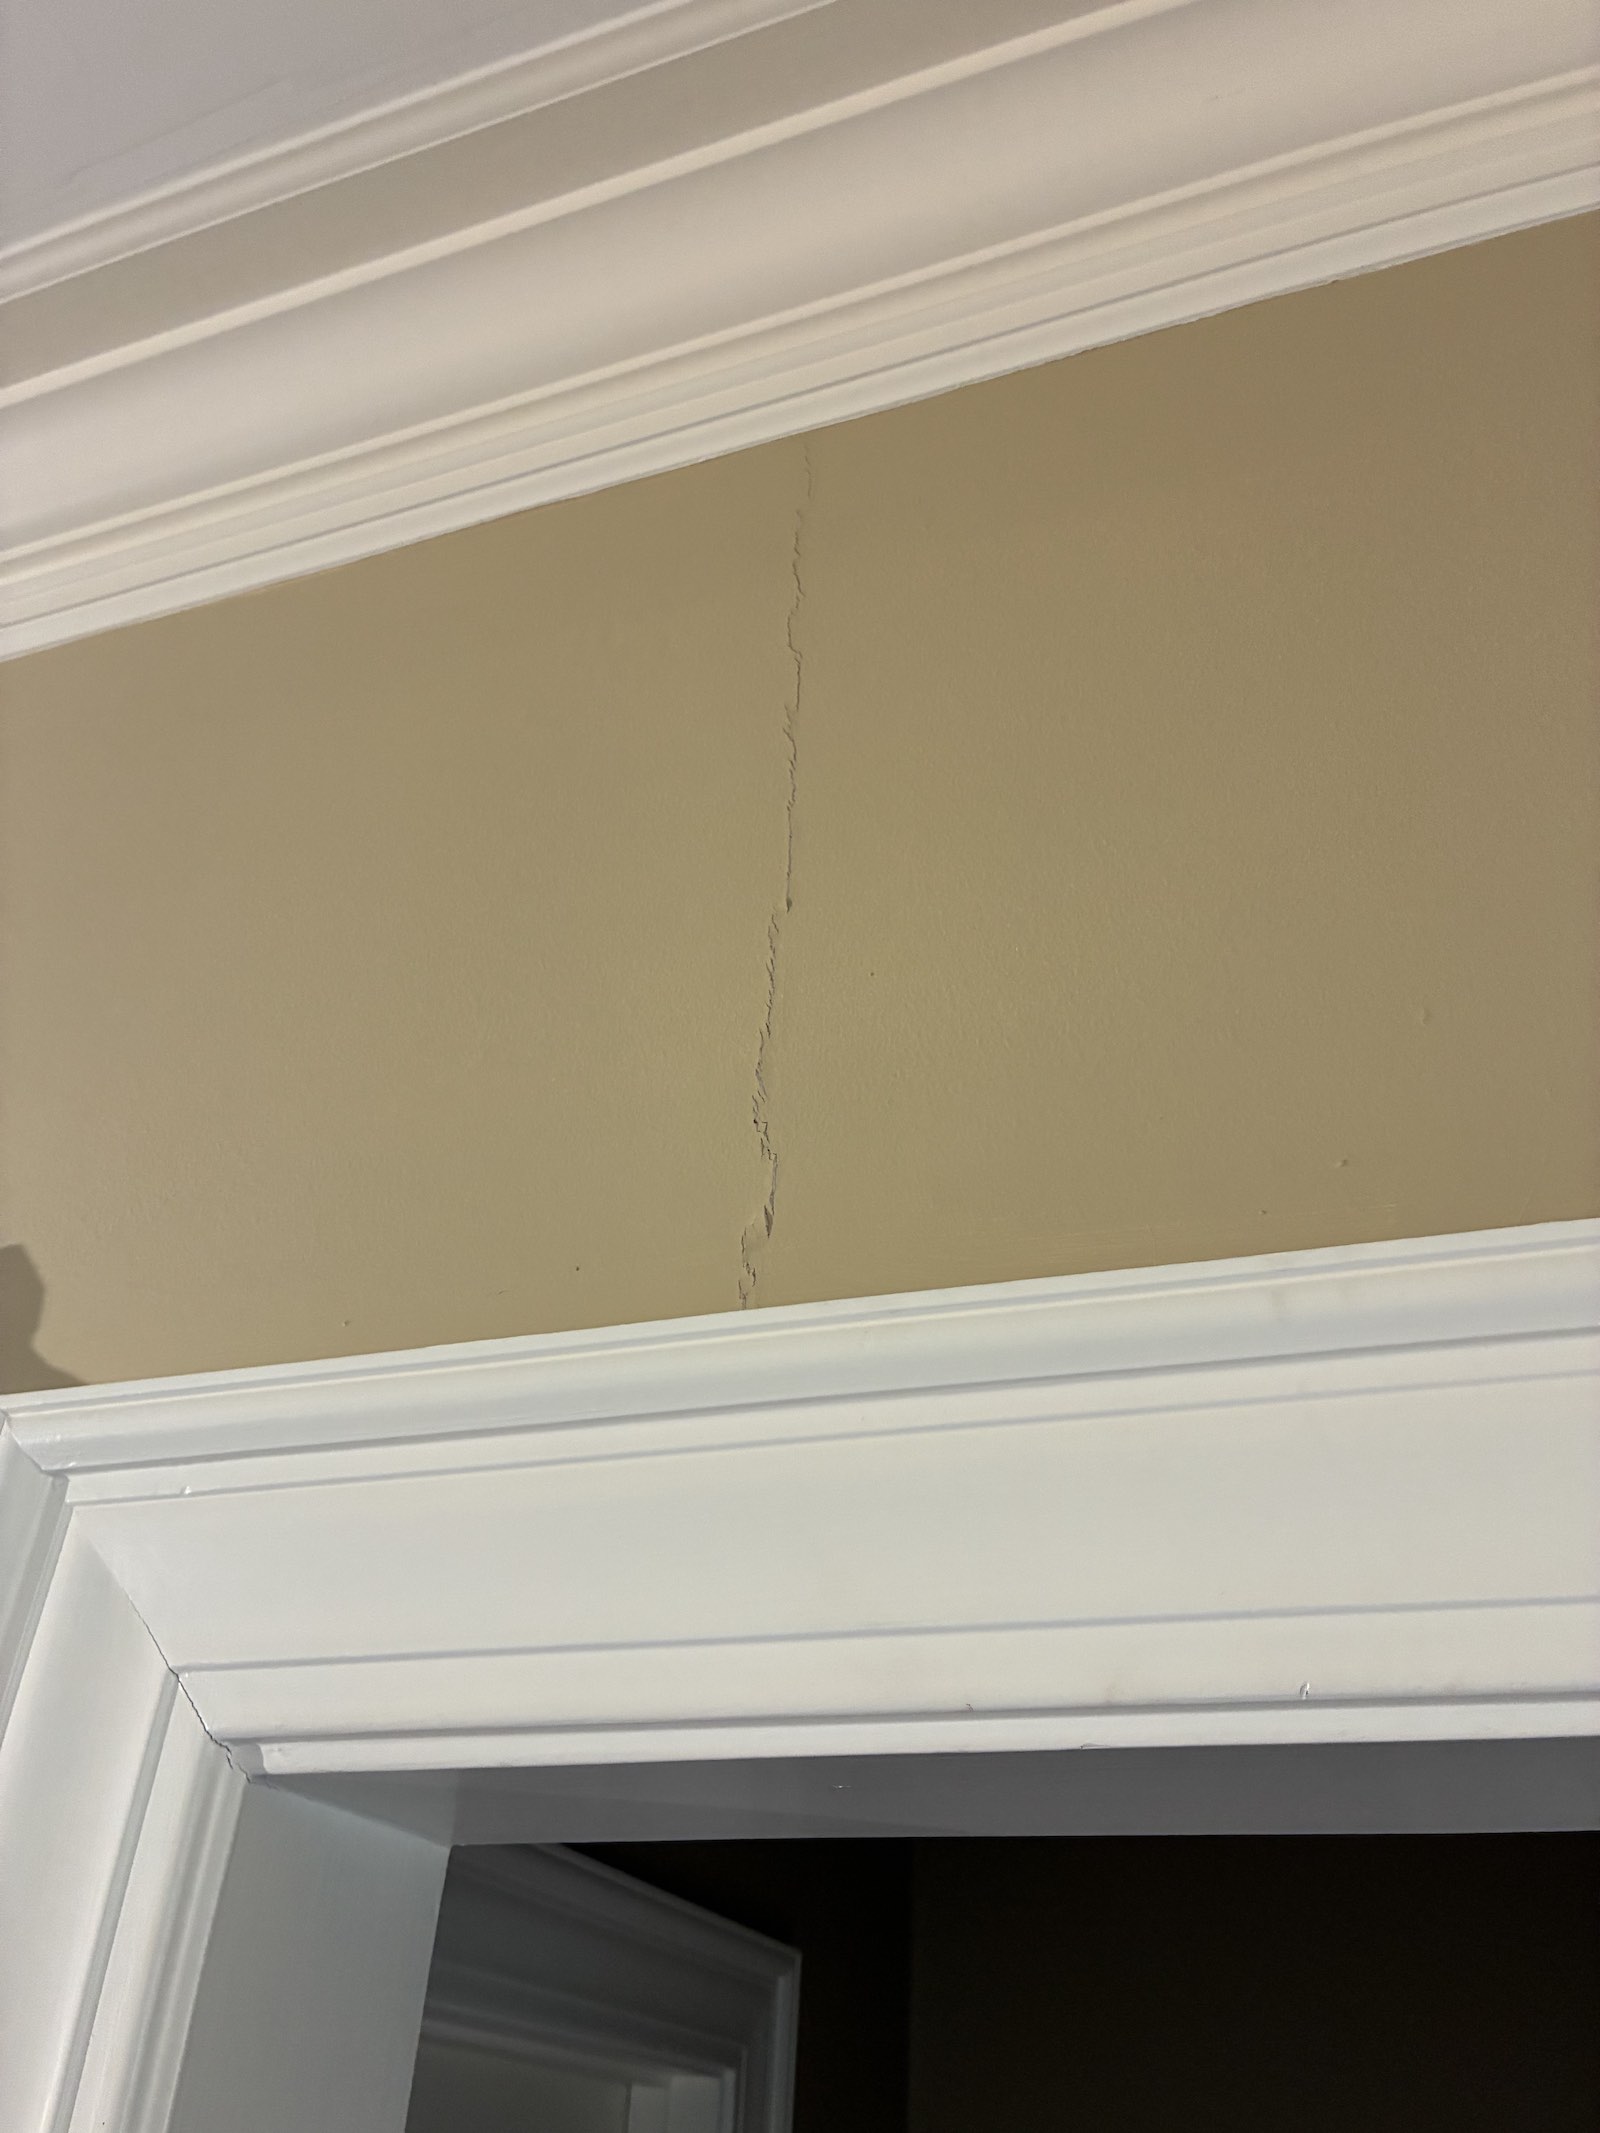
A crack above an interior door looks like the kind of flaw a fresh coat of paint will cover. It will not. In this project, the crack followed a vertical drywall joint from the door casing toward the crown molding. The goal was to rebuild and finish that joint so it disappeared into the wall after priming and painting, not merely to fill the line. That is prep-first interior painting.
One crack, many decisions
Most homeowners see a line to cover.
A prep-first painter looks at whether the joint has failed and what it will take to make the repair disappear after the room is painted.
Paint changes color and sheen. It does not stabilize loose compound, reinforce a cracked seam, or flatten a raised patch. If the surface underneath is damaged, the crack can still show through the new finish.
This crack is one repair. On a real interior repaint, the same judgment and finish work repeats across nail pops, dents, bad patches, loose tape, and visible seams. Each one may look small on its own. Together, they are what separates a room that looks okay from one that looks clean, updated, and truly finished.
Why cracks show up above door openings
Door openings are common spots for drywall cracks. Normal framing movement can stress the drywall around the opening, and a crack that follows a straight seam often means the original taped joint has loosened or failed.
In this case, the crack ran along a vertical drywall joint directly above the door: a failed joint, not necessarily a settling crack. Without seeing the framing, we cannot pin down the root cause from the crack alone. What we can do is repair the joint properly so it stays flat and paint-ready.
Some cracks deserve a closer look before anyone starts mudding:
- The crack is widening over time.
- It keeps coming back after repainting.
- The door sticks, binds, or will not latch properly.
- You notice other movement around the opening.
A cosmetic repair should not hide an active structural problem. For a stable crack along a failed drywall joint, the process below prepares the surface the right way before paint goes on.
Ceiling cracks that keep reopening after paint often need a different scope. Read why cathedral ceiling paint keeps cracking when prep is skipped.
How we repair a cracked drywall joint before painting
What follows is what one repair takes: open the crack, retape the joint, feather it wide, polish the surface, and spot-prime before color. The same standard applies to every visible flaw in the room, even when the steps differ.
Step 1: Inspect the original crack
We started by looking at the full length of the crack and confirming it followed a drywall joint. Here, it ran vertically from the door casing toward the crown molding. The irregular edges and location along a seam told us material at the joint had lost its bond.
Rolling paint over the line would only change its color. The broken edges would still cast shadows, and any loose material beneath the paint could keep separating.
Step 2: Remove the loose material and open the crack
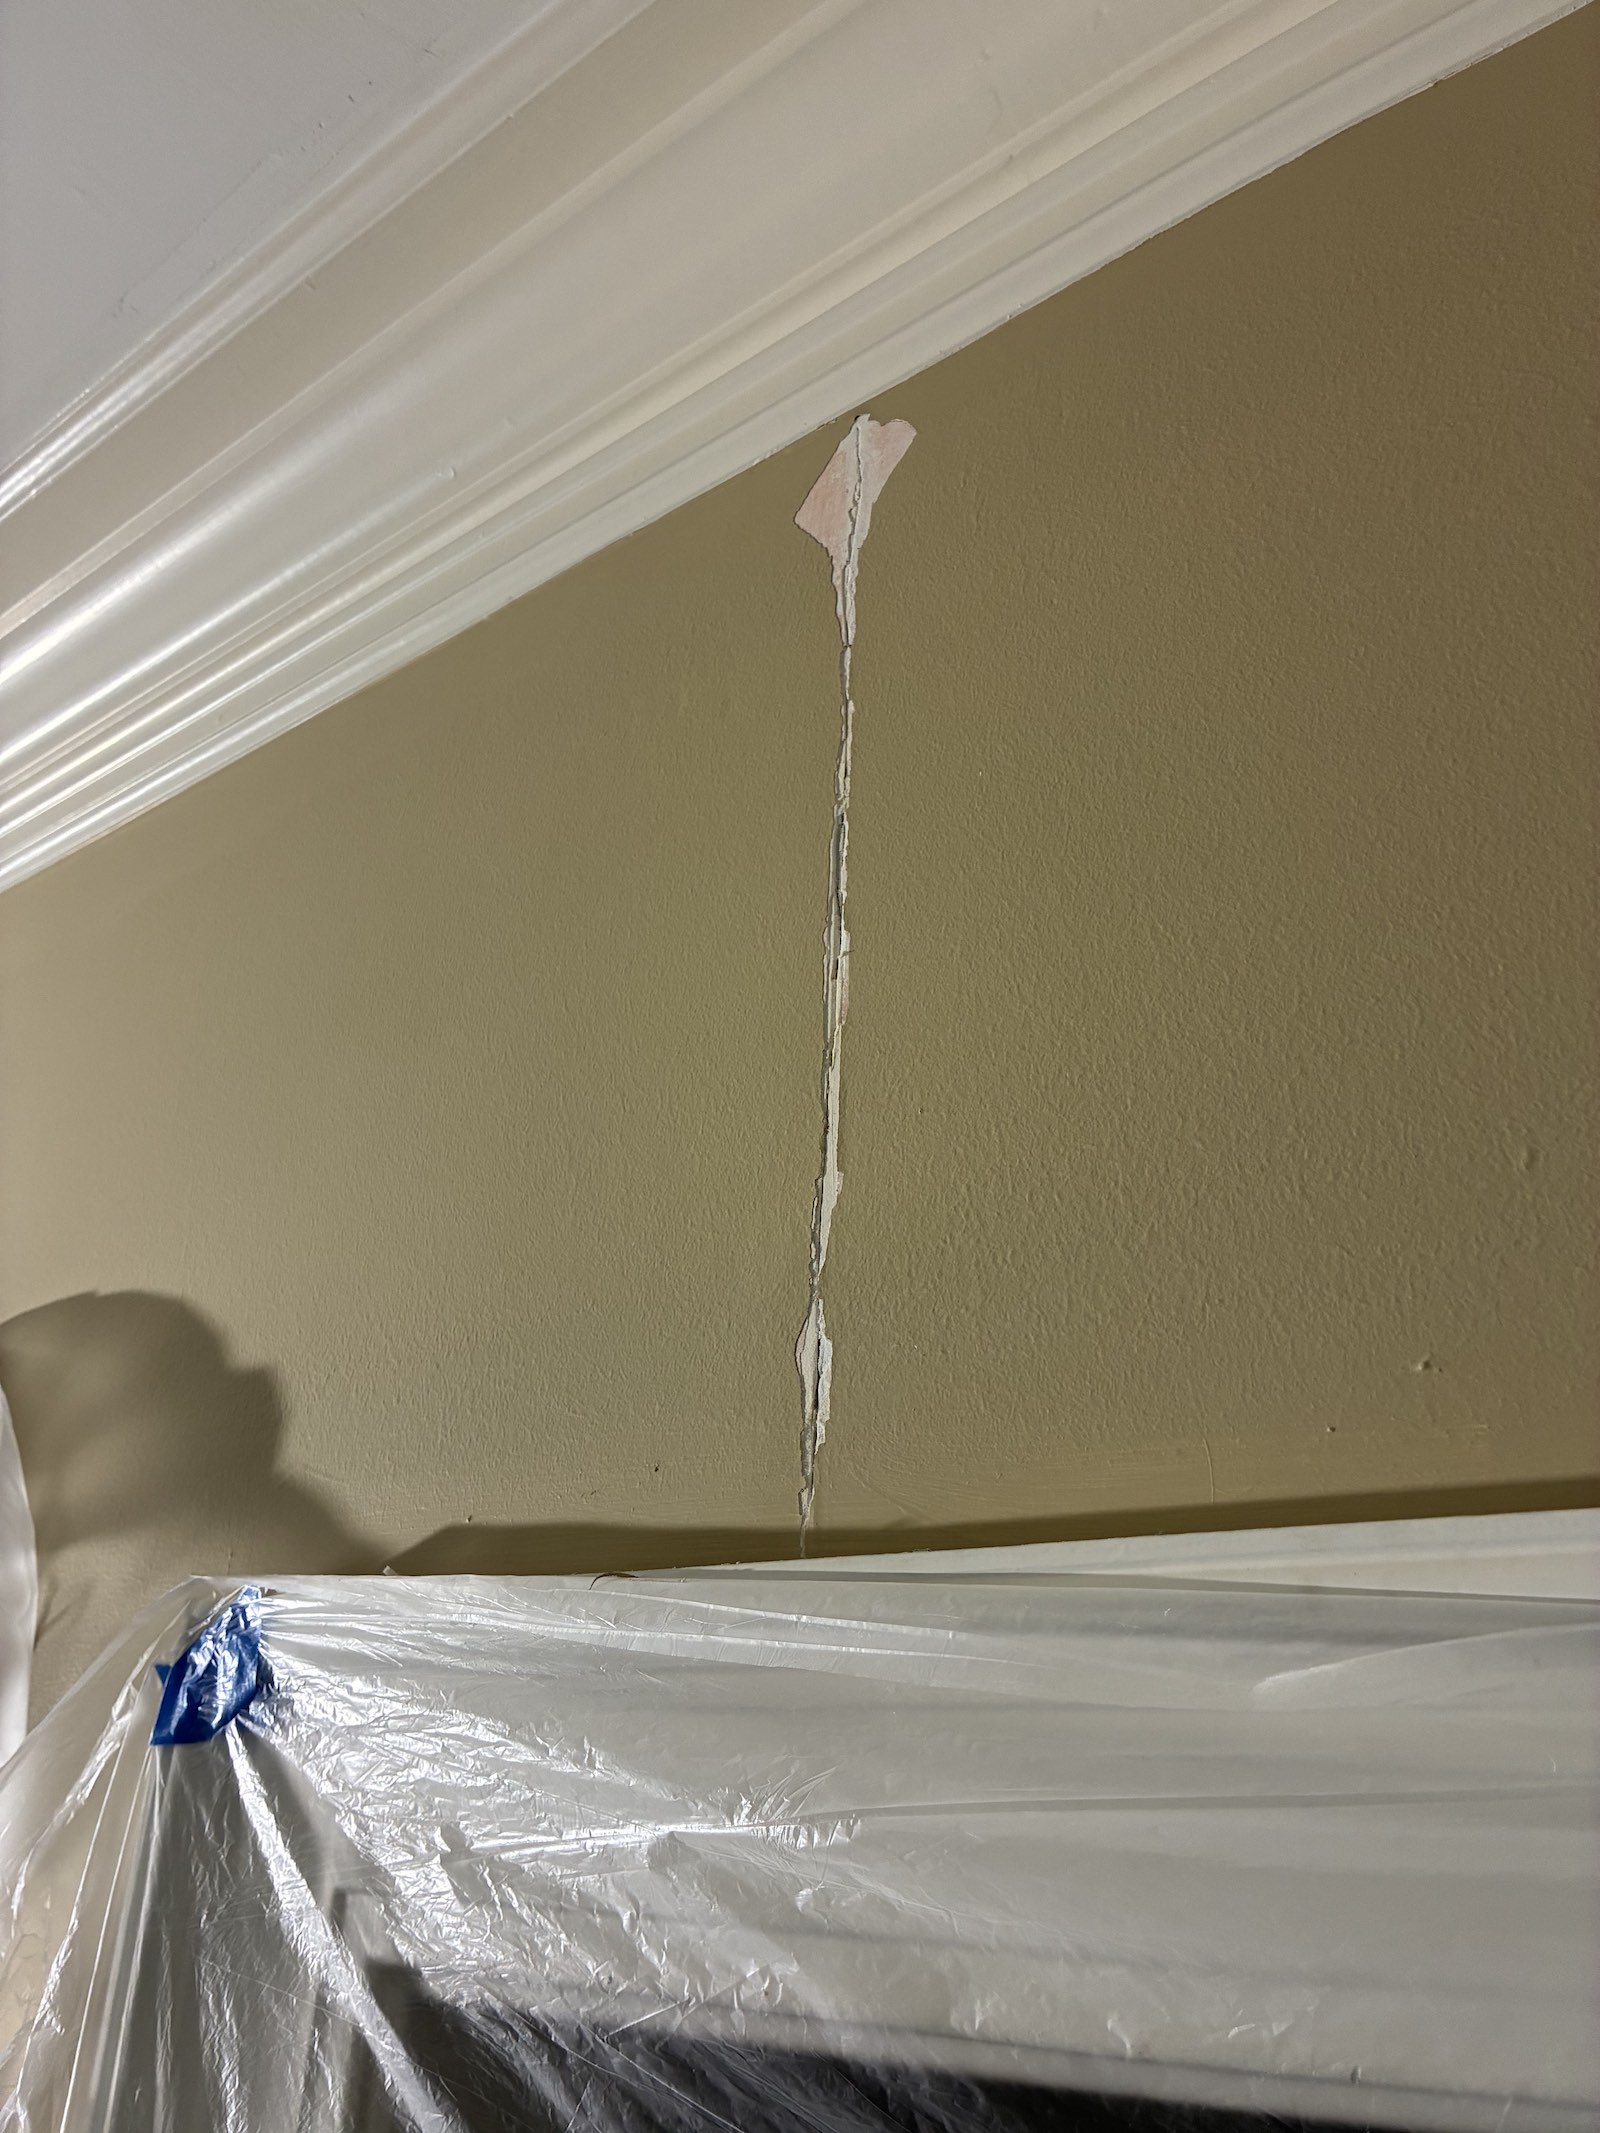
Next, we gouged out the loose joint compound and opened the crack until the remaining edges were solid. This stage often makes the damage look worse. That is normal. Leaving weak material in place would compromise everything we applied over it.
Primer and paint can only bond as well as the surface beneath them. Fresh compound over loose paint, crumbling mud, or a failing joint can lift or crack again. Opening the damaged area also gives the new repair room to sit instead of trapping a brittle line under the finish.
Step 3: Apply tape and the first coat of joint compound
We rebuilt the joint with drywall tape embedded in joint compound. Tape bridges the seam and reinforces it. Compound alone can fill the opening, but it does not provide the same support across the joint. At this stage, the priority is solid tape adhesion and a clean, reasonably flat first coat, not a paint-ready finish.
A crack needs more than a cosmetic skim. Reinforcing the joint reduces the chance the same line telegraphs through the new paint. Keeping the first coat controlled also avoids an unnecessarily large hump that would be harder to hide later.
Step 4: Apply a wider second coat to feather the repair
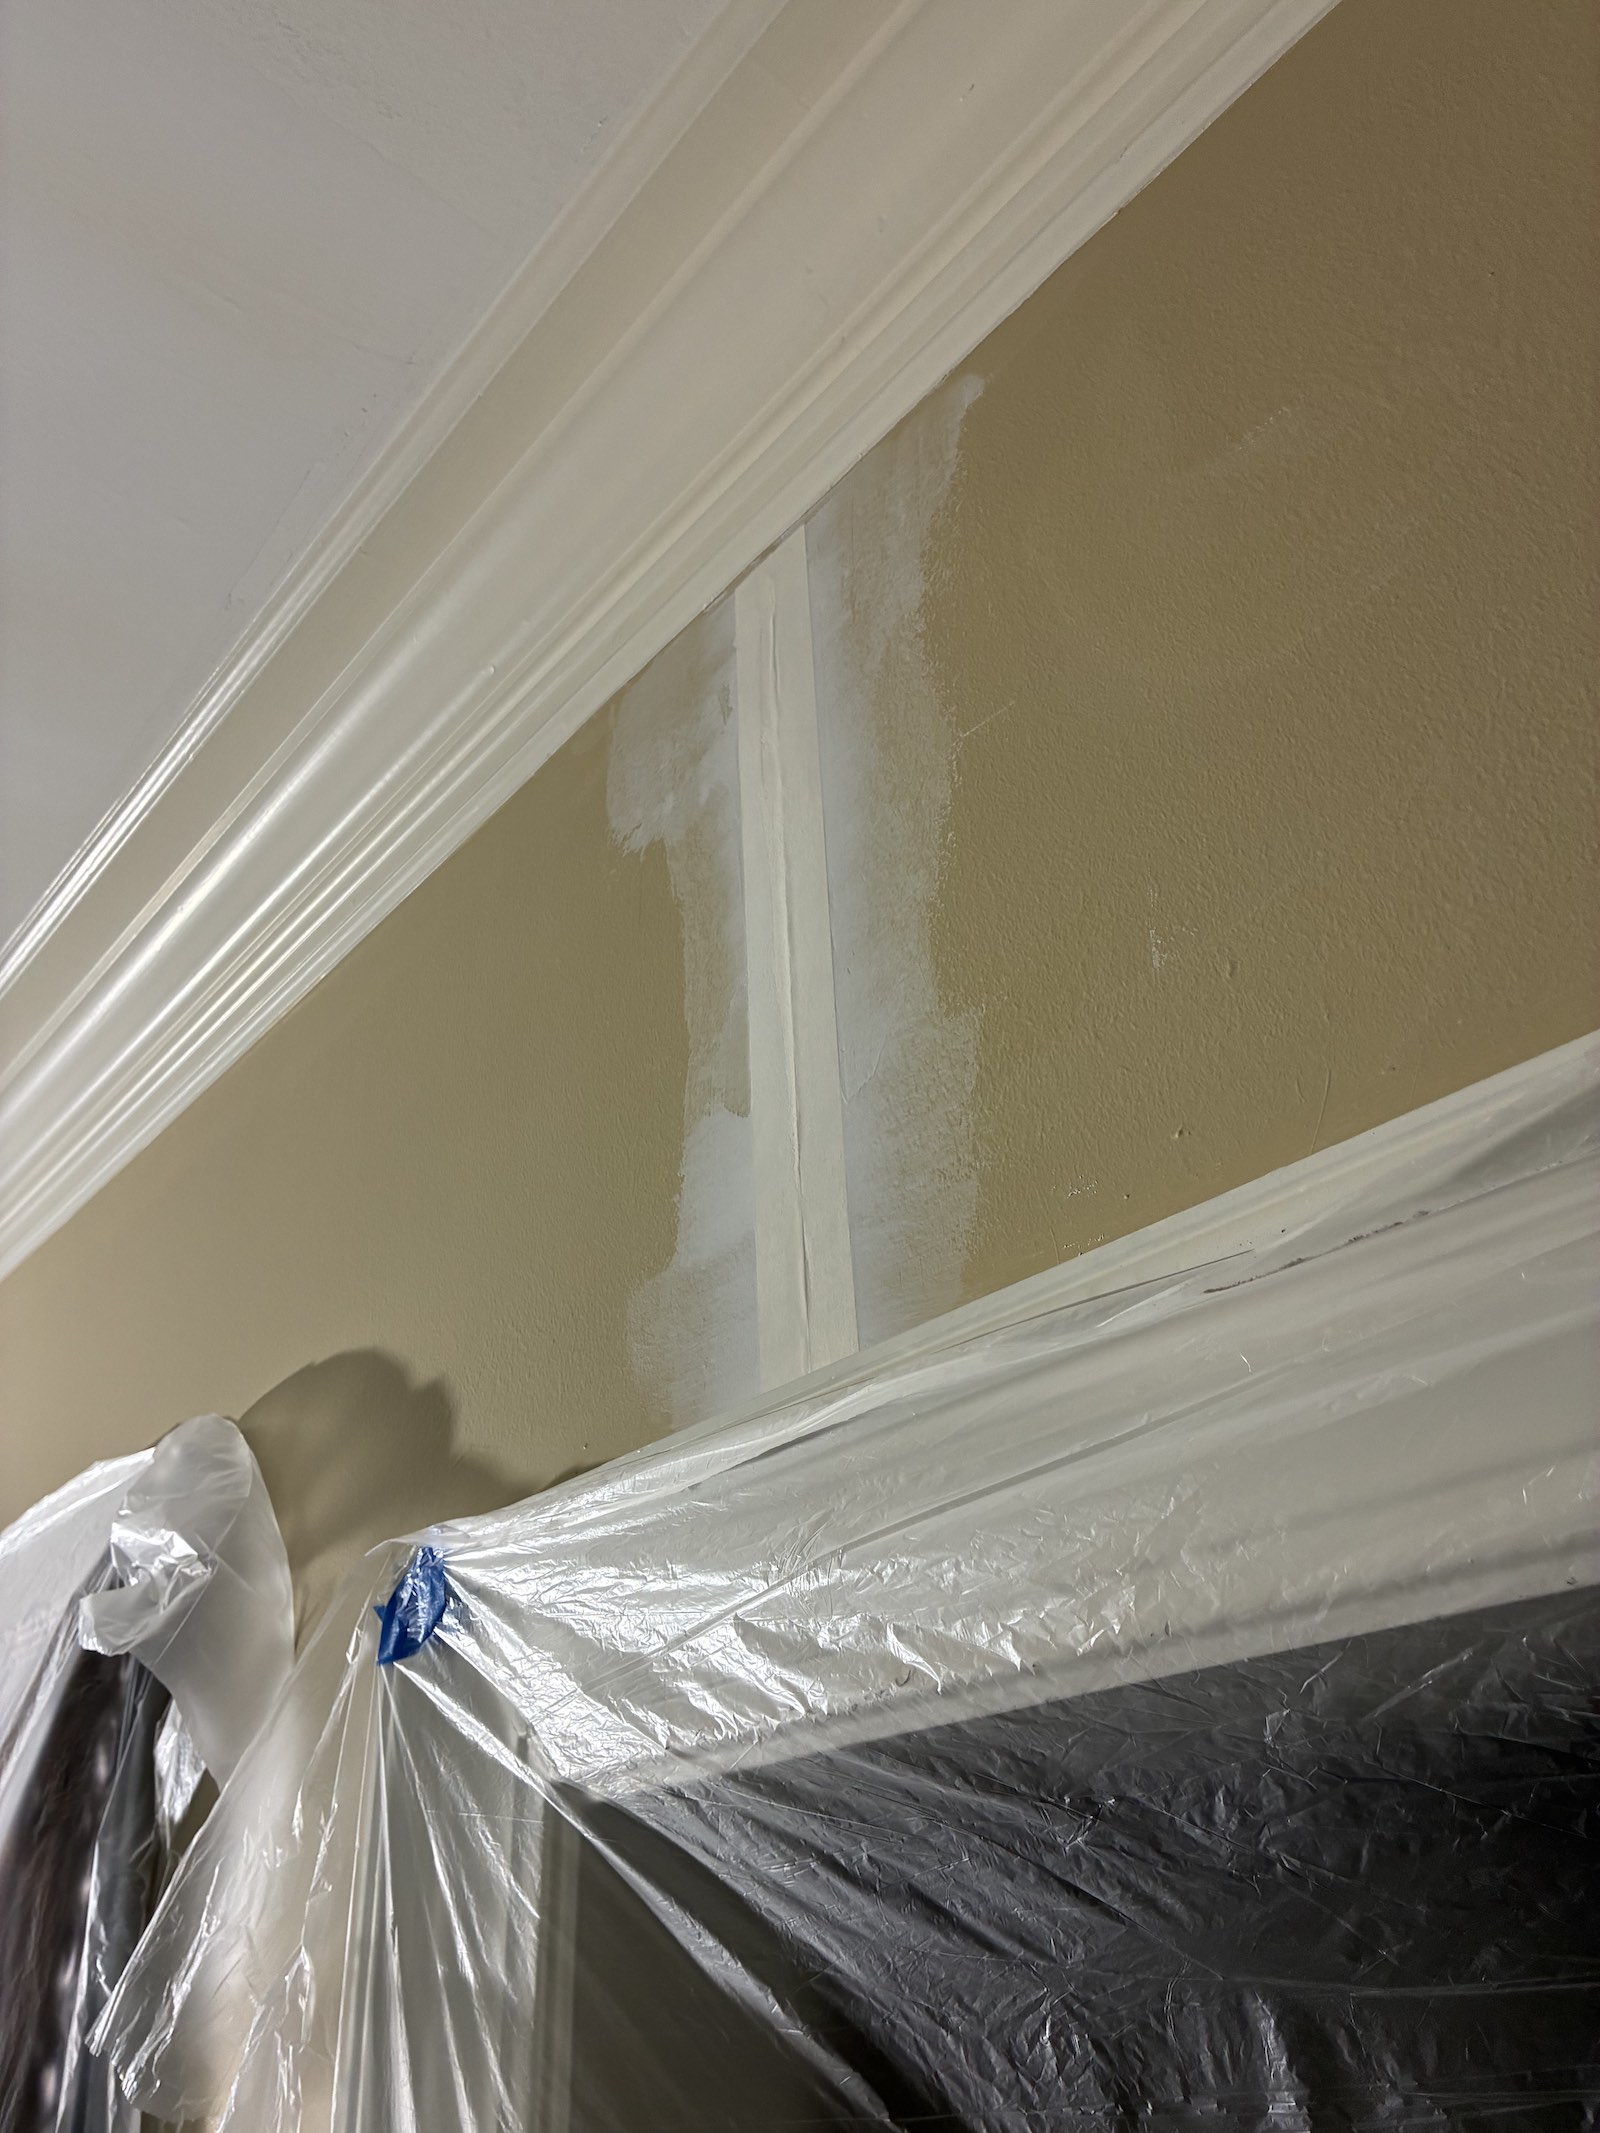
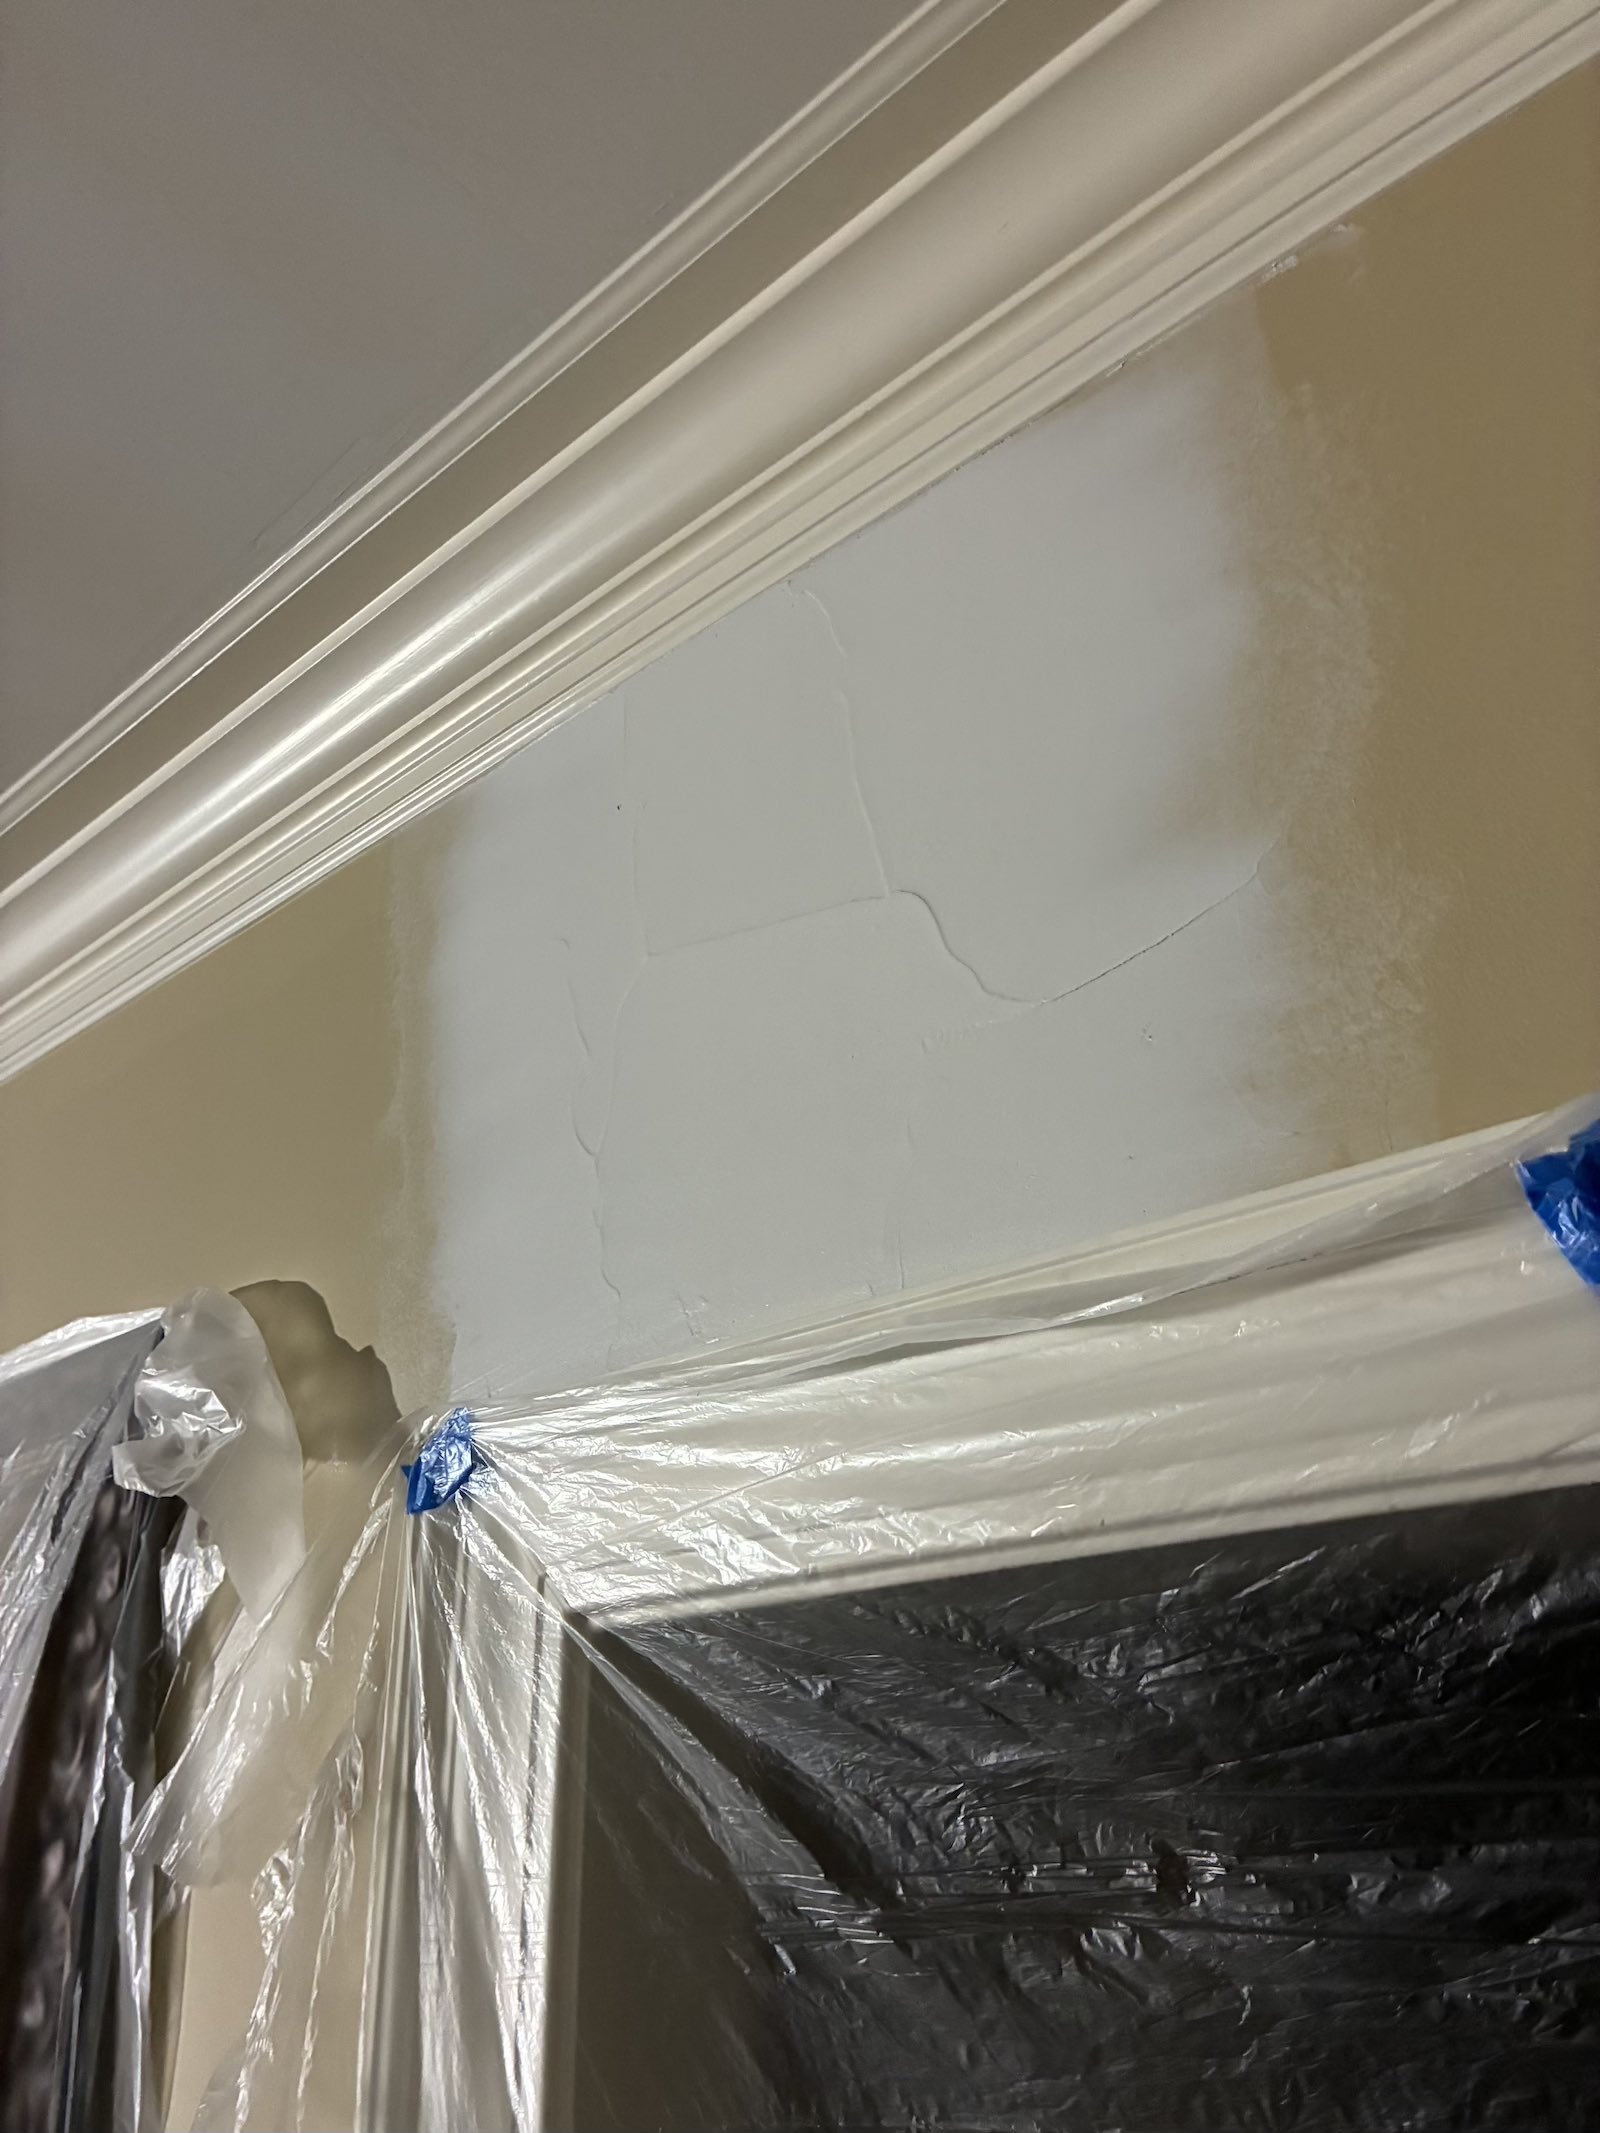
Once the tape coat dried, we applied a second coat and feathered the edges much farther onto the surrounding wall. Tape and compound add a small amount of thickness, so a narrow coat would leave a visible ridge. Spreading the next coat wider creates a gradual transition the eye is less likely to catch.
Paint does not hide poor feathering. Window light, lamps, and higher-sheen finishes can make a narrow patch or raised edge more obvious, not less. The smoother and broader the transition, the more uniform the painted wall looks.
Step 5: Apply the polish coat and finish sanding
Before the third coat, we sanded the repair with 100-grit paper to remove ridges and high spots. Then we applied a thin third, or polish, coat to fill small imperfections and refine the transition. After it dried, we sanded with 150-grit paper for the final surface.
The goal is not just a smooth center. The entire transition should be free of knife edges, high spots, pinholes, and deep sanding scratches. Those defects may seem insignificant on bare compound, but primer and paint create a consistent sheen across the wall, and that is when small flaws become obvious.
Spot-priming before the finish coat
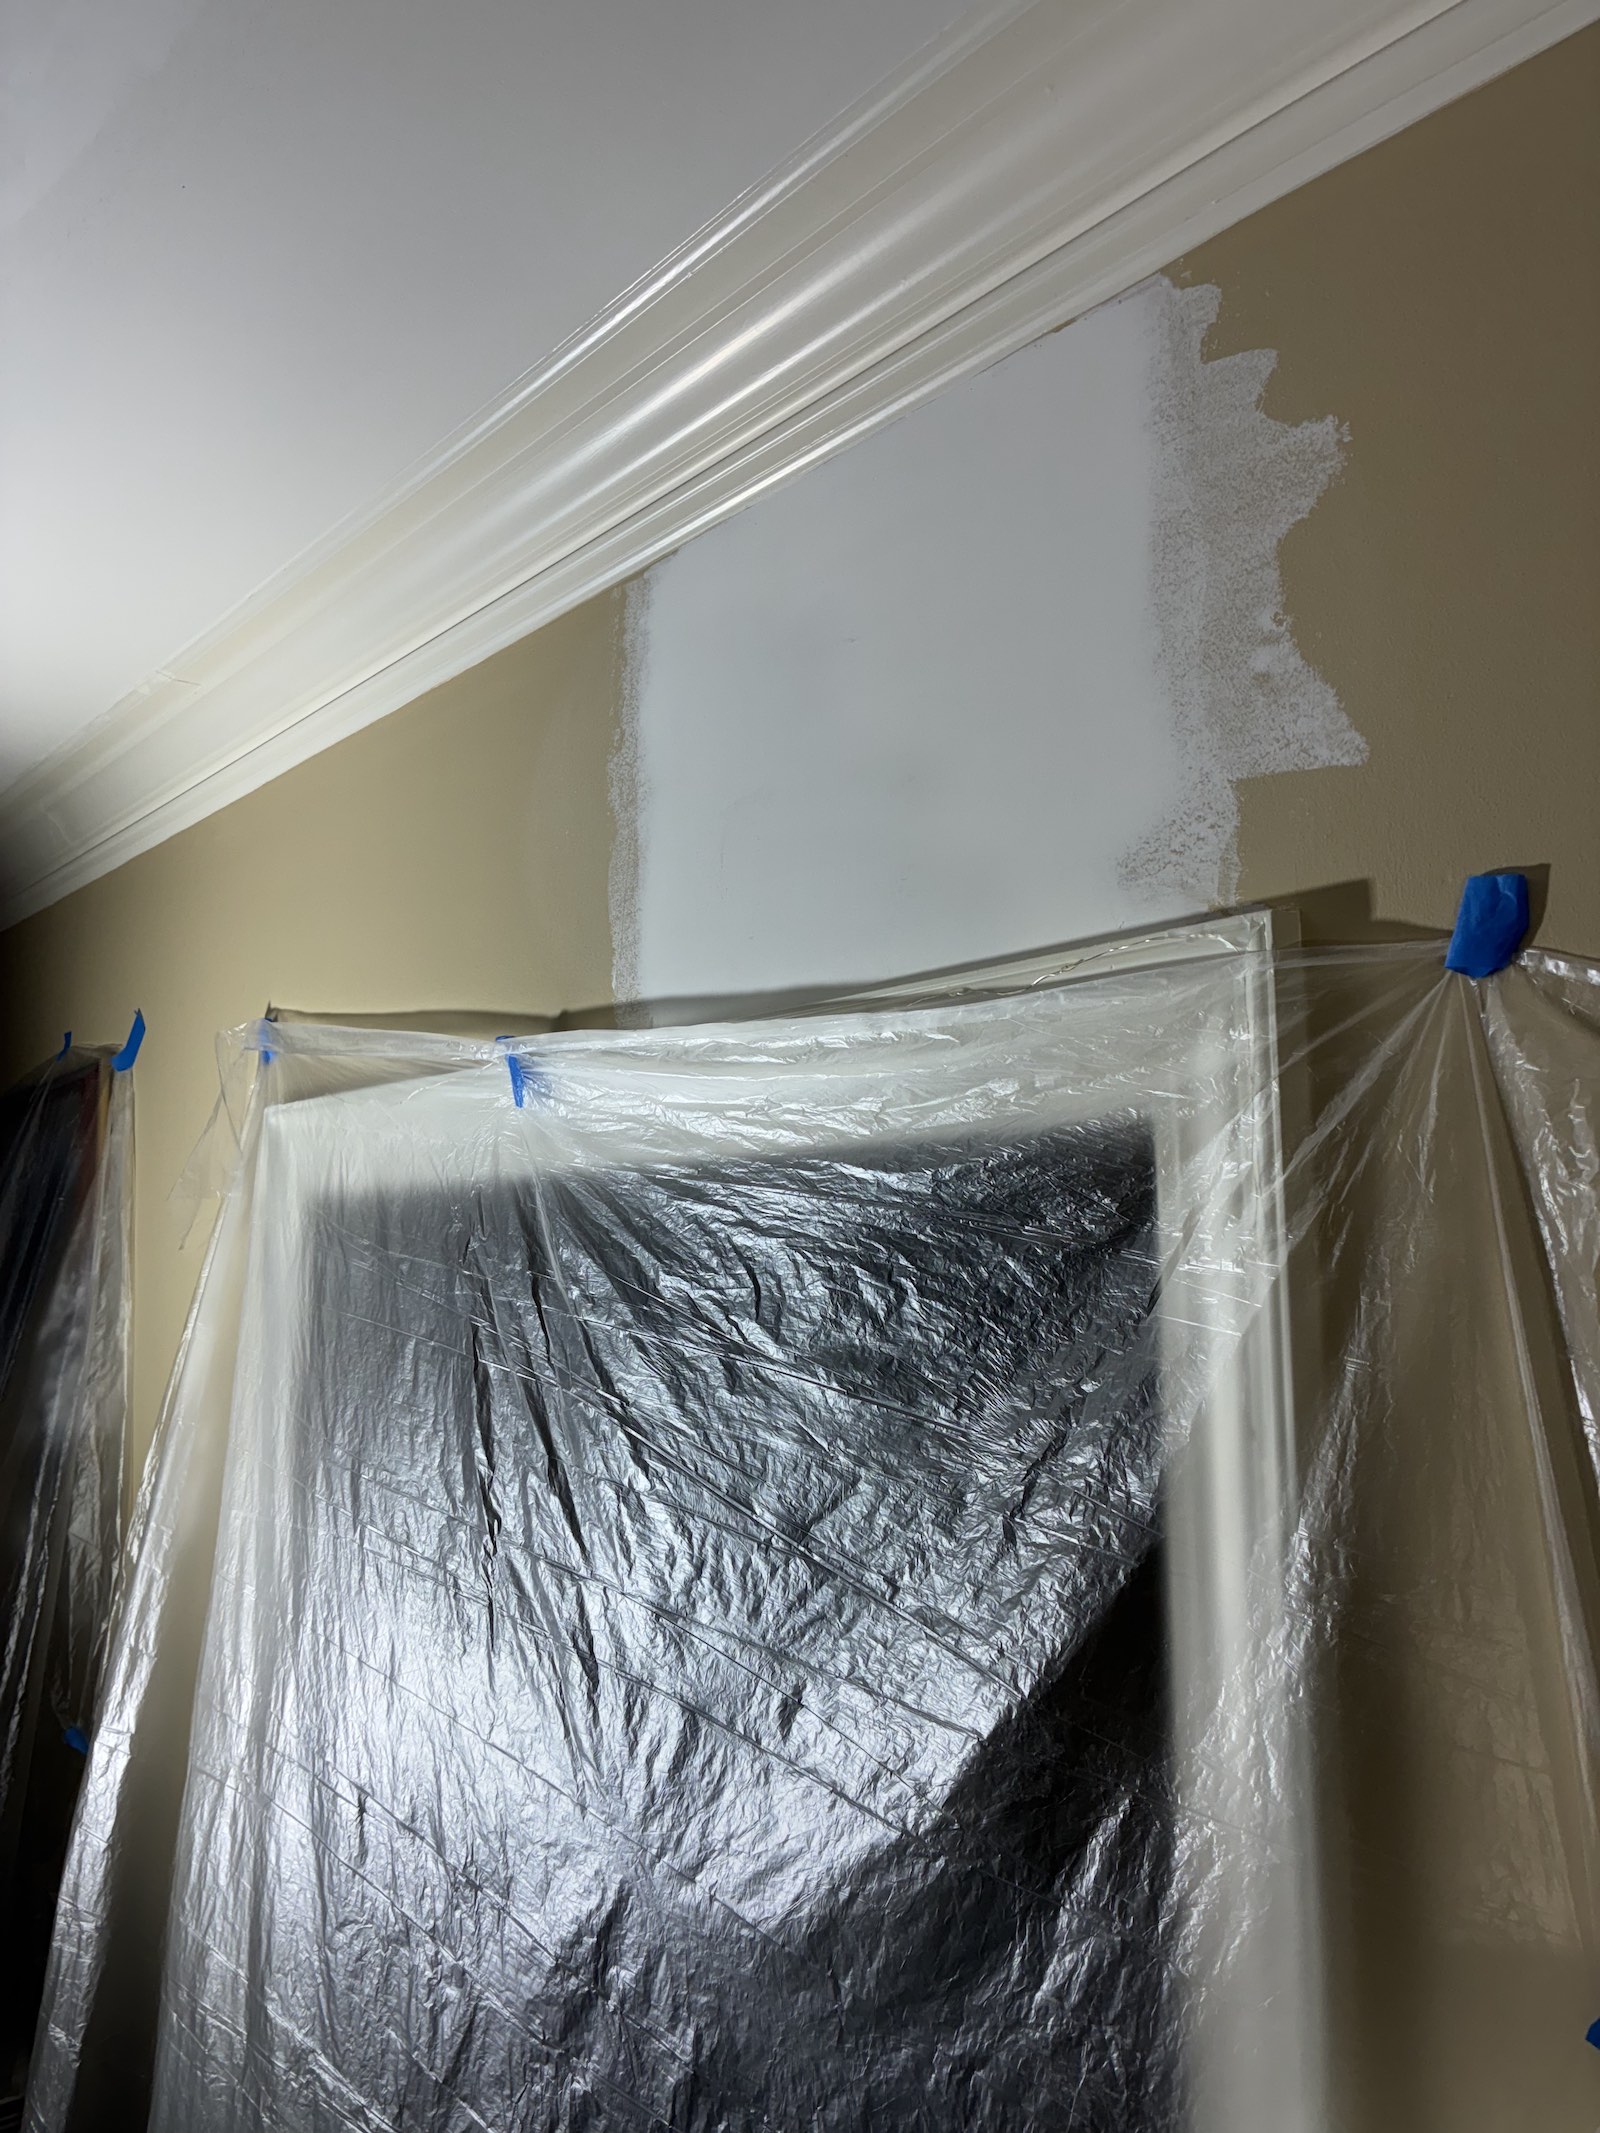
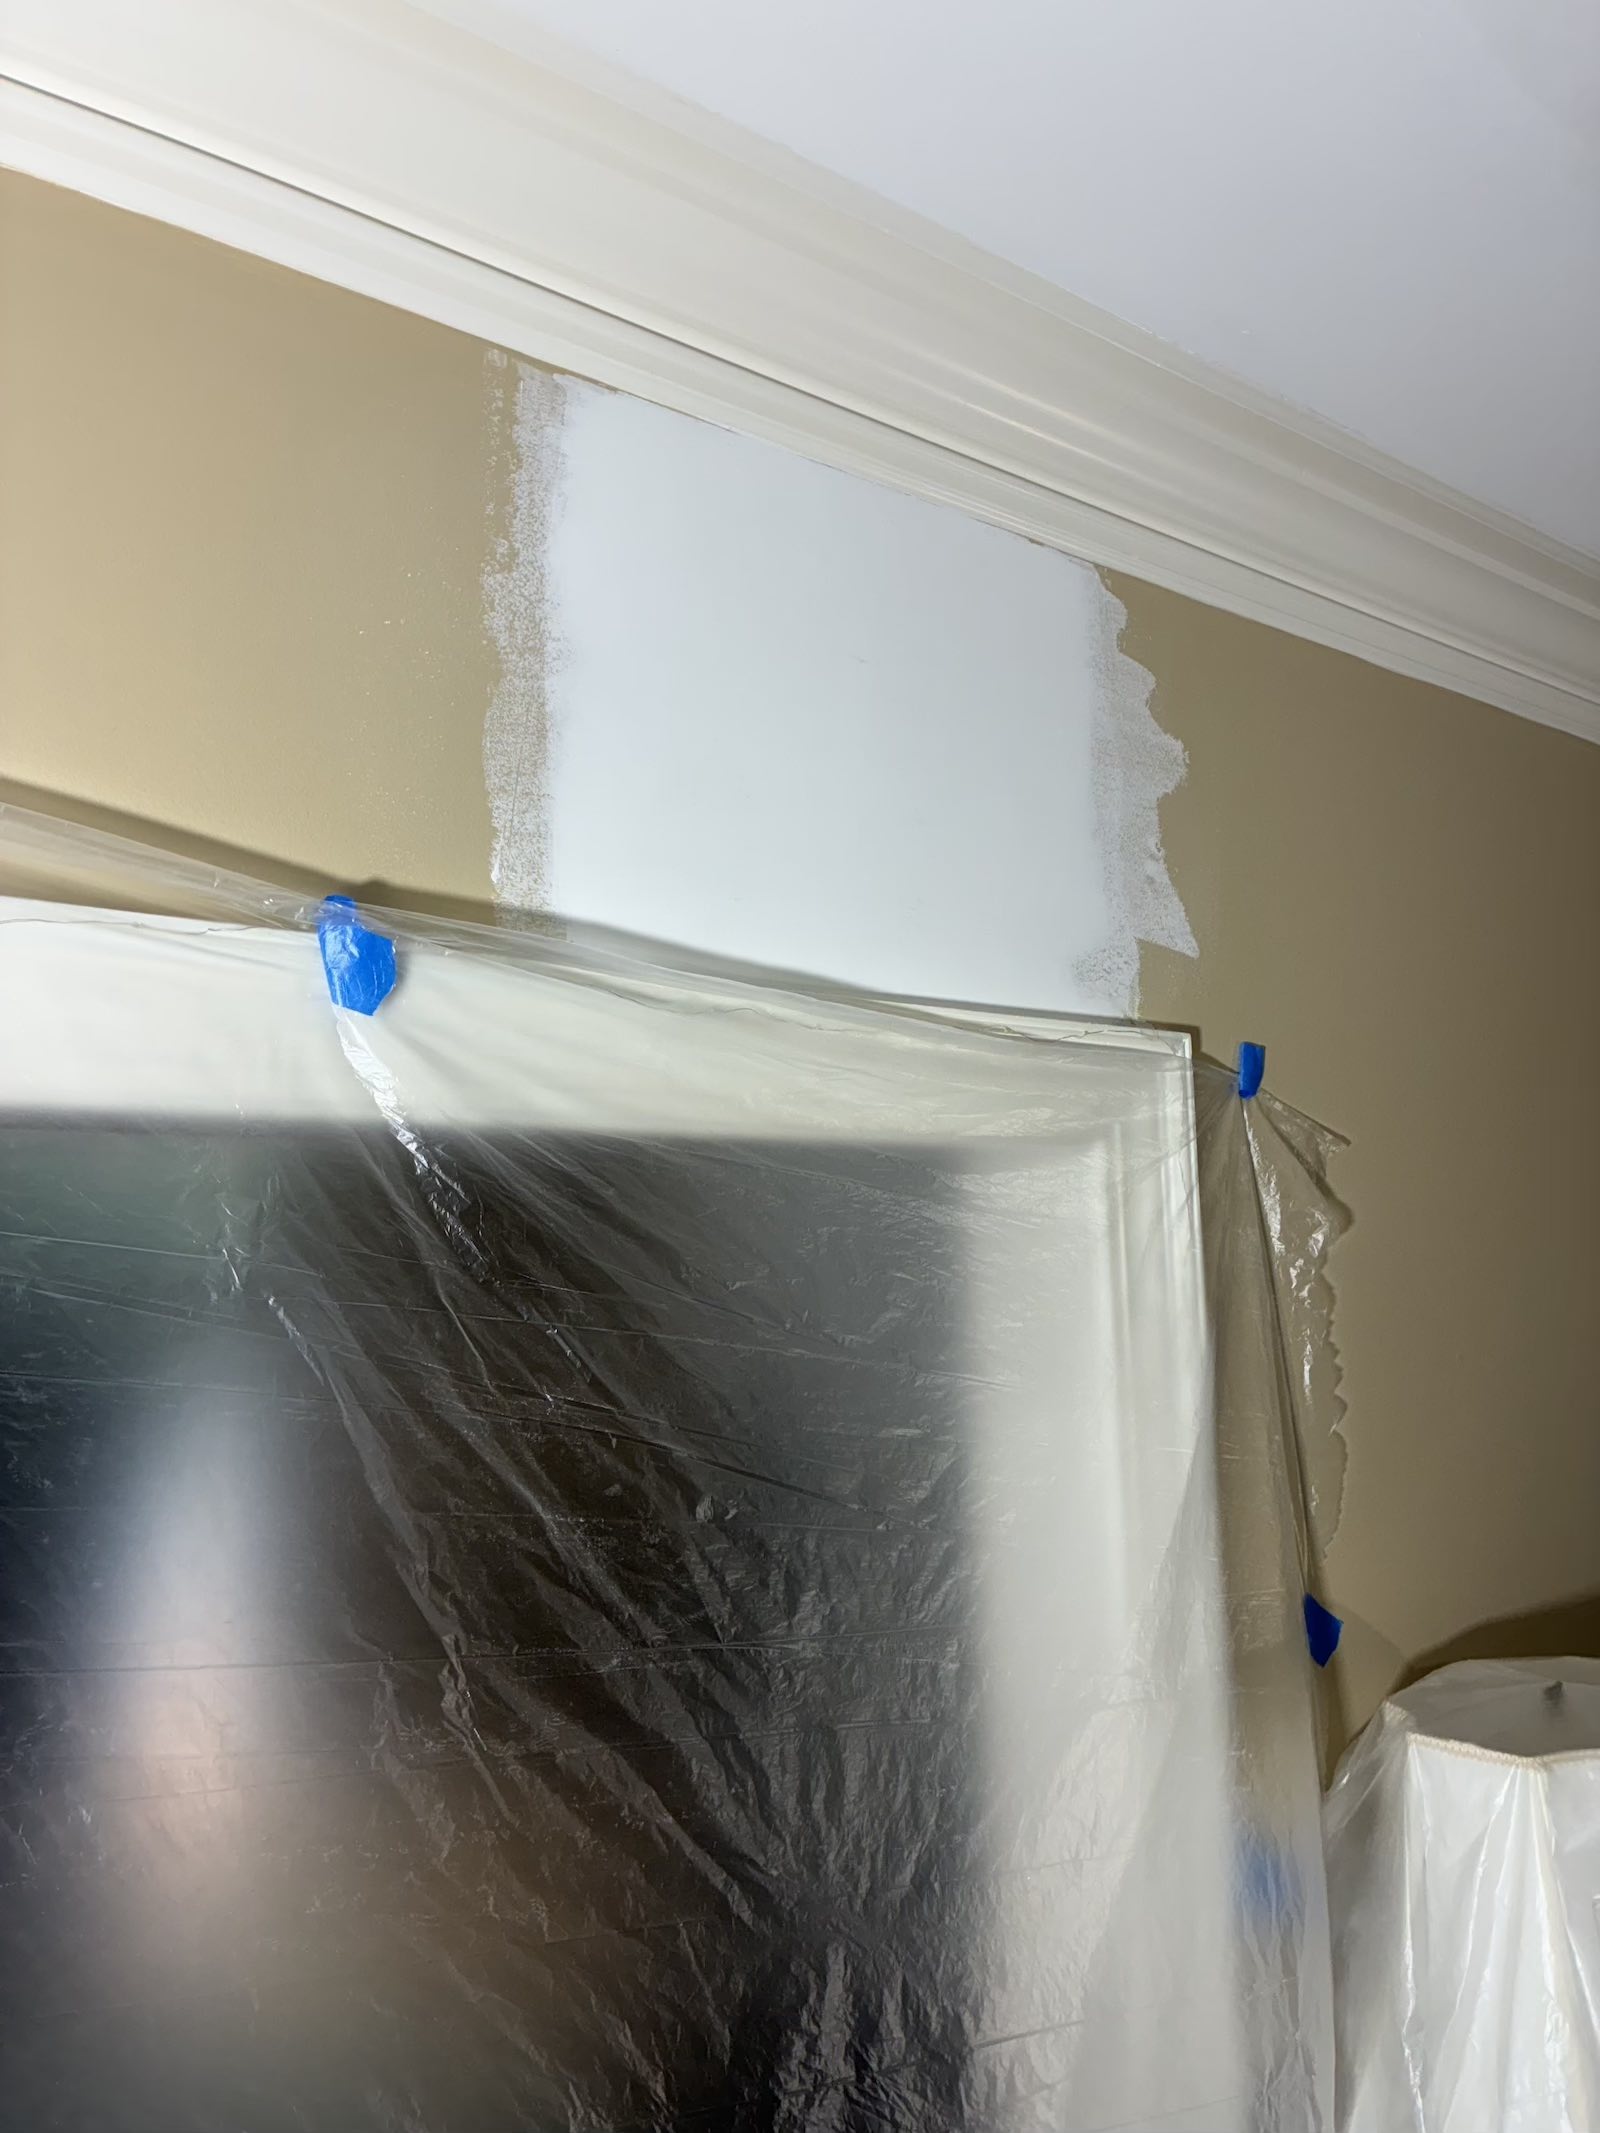
After final sanding, we remove the dust and spot-prime the new joint compound. Fresh compound is more porous than the surrounding painted wall. Roll finish paint directly over it and the repaired area can absorb color differently, leaving a dull or uneven spot called flashing.
Primer seals the repair and gives the finish paint a more consistent base. After priming, we inspect the wall again under good lighting. Any remaining pinholes, edges, or sanding marks are easier to fix before the finish coats go on.
When color or sheen matching matters, painting the full wall from corner to corner usually produces a more uniform result than touching up only the repaired area.
How McEvoy Pro Painters scopes prep-first interior painting
Most disappointing paint jobs are prep problems. A painter could roll new color over this wall quickly, but the crack would still make the room look unfinished. The drywall work is not separate from the quality of the paint job. It is what makes a clean finish possible.
This crack is one example of the prep that happens before the first coat across an entire interior painting project. The same level of care shows up on nail pops, dents, bad previous patches, loose tape, and visible seams. Each one is a small problem that adds up to the difference between a room that looks okay and one that looks truly finished.
When we scope a repaint, we assess visible flaws, define the needed repairs, sand and spot-prime where needed, and then paint the room. That gives you one clear written scope instead of coordinating separate drywall and painting contractors for the typical repairs included in the project.
That is the work before the work, and it is part of how we scope interior painting with wall repair.
Torn paper after adhesive removal is a different prep problem. See why torn drywall paper must be sealed before painting.
- Cracks along drywall joints, including above doors and windows.
- Nail pops and small dents.
- Bad previous patches that flash through paint.
- Loose or failed tape at seams.
- Spot priming, sanding, and feathering so repairs disappear after the finish coat.
This service is best suited to homeowners planning to repaint a room, several rooms, or a larger portion of the interior, not those looking for one small standalone drywall repair. The walkthrough above shows what that prep looks like on one crack. On a full project, the same standard applies across every flaw we include in the scope.
FAQ
Can I paint over a crack above a door?
You can, but it usually does not work for long. Paint may change the color of the line temporarily, but it will not stabilize a failed joint, reinforce loose compound, or flatten a raised repair. The crack can telegraph through the new finish, especially once light hits the wall at an angle.
Is this a settling crack or a failed drywall joint?
A crack that follows a straight drywall seam above a door is often a failed taped joint, not necessarily settling. Without inspecting the framing, nobody can be certain from the crack alone. If the crack is stable and runs along a seam, opening, retaping, feathering, and priming the joint is the right prep before interior painting.
Why did the crack come back after the last paint job?
Fresh paint does not fix a failed joint. It follows it. If the previous repair only skimmed over the line or skipped retaping, the same stress can reopen the seam and split the new paint along the old crack. Proper prep addresses the joint, not just the color on top.
Do I need tape, or is joint compound enough?
Compound alone can fill a crack, but it does not bridge the seam the way tape does. For a crack along a drywall joint, we embed tape in the first coat to reinforce the repair and reduce the chance the line telegraphs through the finish paint.
Should I spot-prime before painting over a drywall repair?
Yes. Fresh joint compound is more porous than surrounding paint. Without spot primer, the repaired area can flash, absorbing finish paint differently and leaving a dull or uneven spot. Primer seals the repair and gives the finish coat a consistent base.
Do I need separate drywall and painting contractors?
Not with McEvoy Pro Painters. We handle wall repair, sanding, spot priming, and interior painting in one scope, so prep does not get rushed or skipped between trades.
Who handles drywall crack repair and interior painting in Collierville and Germantown?
McEvoy Pro Painters provides prep-first interior painting with wall repair in Collierville, Germantown, Bartlett, Cordova, Lakeland, Arlington, and nearby Memphis-area communities.
Ready for walls that look finished, not just repainted?
If you are preparing to repaint and your walls have cracks, nail pops, dents, visible seams, or old patches, point them out during the estimate. We will identify what should be repaired before painting and include the appropriate prep in a clear written scope.
McEvoy Pro Painters handles interior painting with wall repair throughout the Memphis metro area, including Collierville, Germantown, Bartlett, Cordova, Lakeland, Arlington, and nearby communities.
Call 901-472-8777 or request a free interior painting estimate to talk through your project.